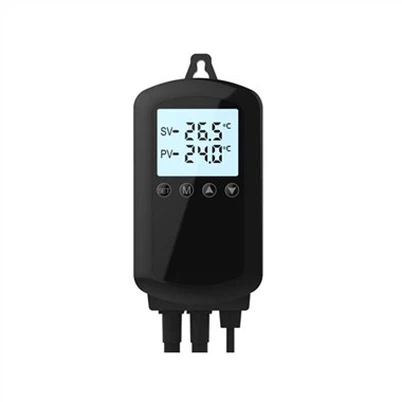
HYSEN HY533 WiFi Smart Thermostat Configuration & User Manual
Leave a message
The HYSEN HY533 is a universal smart WiFi thermostat for household and engineering scenarios, perfectly suited for temperature control of floor heating, water heating and other heating equipment. After WiFi connection, it supports mobile remote temperature adjustment, timing programming, real-time temperature monitoring, intelligent energy saving and other practical functions. Matched with operation tutorial videos, this manual provides step-by-step guidelines for fast WiFi configuration and solutions to common connection failures.
I. Pre-Configuration Notes (Must Read)
2.4G WiFi Only: The HY533 thermostat does not support 5G WiFi bands. Please configure the device with a 2.4GHz home WiFi network. For dual-band routers, separate the 2.4G and 5G WiFi signals temporarily before configuration.
Enable Required Mobile Permissions: Turn on your phone's WiFi and Bluetooth functions, and disable VPN, mobile data and personal hotspot to create a pure network environment free of interference.
Official Supporting APP: Download and log in to Smart Life (Tuya Smart) or the official HYSEN management APP.
II. Standard WiFi Configuration Steps for HY533 Thermostat
Step 1: Enter WiFi Pairing Mode
Keep the thermostat powered on. On the power-on interface, press and hold the clock key for 5 to 8 seconds until the WiFi icon on the screen flashes, indicating that the device has entered the network configuration mode. Three signal bars on the screen will display to indicate real-time network connection progress.
Step 2: Add Device in the APP
Launch and log in to the official management APP, tap "Add Device" on the homepage, select the thermostat category, and wait for the APP to automatically search for nearby devices pending pairing.
Step 3: Enter WiFi Information
Accurately input your 2.4G WiFi name and password (case-sensitive, including all special symbols). Confirm the information and tap next to proceed.
Step 4: Complete Automatic Network Pairing
Check the signal bars on the thermostat screen: 2 bars mean successful connection to the router; 3 bars mean successful connection to the server. When the full signal bars stay stable and the APP pops up a success prompt, the device is online and ready for normal use.
III. Explanation of Screen Signal Bar Status (Key Video Focus)
1 Signal Bar: Network configuration initialized, device waiting for connection
2 Signal Bars: Successfully connected to the router
3 Signal Bars: Network connection completed, device online on server (If the third bar fails to display, the configuration will time out in 15 seconds. Please restart the pairing process.)
IV. Common Configuration Failures & Solutions
Failure 1: WiFi icon keeps flashing with connection failure Solution: Confirm that you are using a 2.4G WiFi network, verify the correctness of your WiFi name and password, restart the router and retry configuration.
Failure 2: Configuration timeout Solution: This is mainly caused by weak WiFi signal due to long distance from the router. Move the thermostat closer to the router, press and hold the clock key again to re-enter pairing mode and retry.
Failure 3: APP fails to search for the device Solution: Restart your phone's WiFi and Bluetooth, exit and reopen the APP, and reactivate the device pairing mode for re-searching.
V. Post-Connection Functions
After successful WiFi configuration, you can remotely adjust temperature, set on/off schedules, check real-time indoor temperature and switch working modes via the APP. It realizes intelligent whole-house heating management, delivering energy efficiency and convenient user experience.
Summary
Core key points for HY533 thermostat WiFi pairing: Press and hold the clock key under power-on state to enter pairing mode, use only 2.4G WiFi for configuration, and judge network status via the three signal bars. Even new users can finish configuration quickly by following the tutorial video steps.