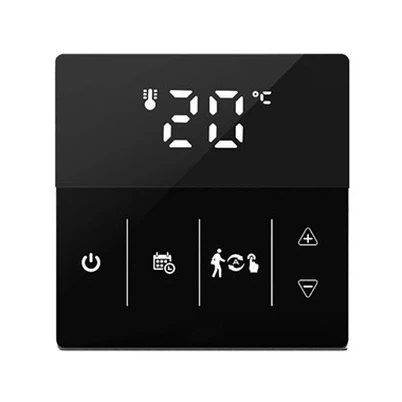
How to Wire a Standalone Thermostat for Home On/Off Control: A Professional DIY Guide
Leave a message
Wiring a standalone thermostat for basic on/off control is a practical DIY project that balances technical precision with user-friendly execution. When done correctly, it delivers reliable temperature management while optimizing energy efficiency-key benefits that make standalone thermostats a staple in modern homes. Below is a step-by-step guide packed with professional insights to ensure a safe and successful installation.
Key Pre-Installation Principles
Before diving into wiring, understanding core fundamentals prevents costly mistakes. Standalone thermostats operate on low-voltage (typically 24VAC) systems, with wiring configurations centered on terminal designations rather than relying solely on wire colors (since color standards vary by manufacturer) . The most common setups for on/off control use 2 to 3 wires, with critical terminals including:
R: Carries 24VAC power from the HVAC transformer.
W: Controls the heating system (signals furnace/heat source to activate).
Y: Manages cooling (triggers the compressor for AC units).
C: Common wire that provides continuous power (optional but recommended for stable operation).
Essential tools for the job include a voltage tester, wire stripper, insulated screwdrivers, needle-nose pliers, a level, and electrical tape . Always use 18-22-gauge solid-core wire (shielded cable is unnecessary) to ensure compatibility with standard terminals .
Step-by-Step Wiring Process
1. Prioritize Safety First
Start by shutting off power to the HVAC system at the main breaker box. Confirm power is disconnected by adjusting the old thermostat-if the system doesn't activate within 5 minutes, it's safe to proceed . Wear rubber gloves and use insulated tools to minimize shock risk, and inform household members to avoid flipping breakers during installation .
2. Remove the Old Thermostat
Gently detach the thermostat faceplate (most pull off or have locking tabs) and unscrew the mounting base from the wall . Take clear photos of the existing wiring, ensuring terminal labels are visible-this serves as a critical reference . Disconnect the wires and tape them to the wall to prevent them from slipping into the wall cavity . Inspect wires for damage (burn marks, frayed insulation) and repair with electrical tape if needed .
3. Mount the New Thermostat Base
Thread the wires through the wire hole in the new base. Use a level to ensure the base is straight (misalignment affects accuracy) and mark screw holes . Drill pilot holes if necessary, insert wall anchors, and secure the base with mounting screws .
4. Make Precise Wire Connections
Refer to your thermostat's manual and the photos of old wiring to match wires to terminals. For basic on/off control:
Connect the power wire (typically red) to the R terminal.
Attach the heating wire (often white) to the W terminal.
For cooling systems, connect the blue/yellow wire to the Y terminal.
If a C wire is present, connect it to the corresponding terminal for consistent power .
Tighten terminal screws firmly to avoid loose connections, but don't over-tighten (this can damage wires) . Double-check that no bare wire is exposed outside terminals-insulate any gaps with electrical tape.
5. Finalize and Test
Align the thermostat faceplate with the base and snap it into place (or secure with the locking screw if included) . Restore power at the breaker box and test the thermostat: set it to heating/cooling mode and adjust the temperature to trigger the system. Verify that the HVAC unit turns on/off as expected .
Professional Tips for Long-Term Reliability
Never skip reading the manufacturer's manual-unit-specific instructions override general guidelines .
Avoid cutting wires too short during installation; leave extra length for future adjustments .
If you encounter thick black/red wires or terminals labeled 1/2/3, you may have a line-voltage system-stop and consult a professional, as low-voltage thermostats are incompatible .
Routine maintenance: Clean the thermostat faceplate monthly and inspect wiring connections annually for tightness .